Installing Developer Tools on Ubuntu

GNU Compilers

By default Ubuntu installs some development tools but some key components might be missing.  For example I didn’t see g++, GNU’s C++ compiler.  Luckily it’s easy to fix by installing it directly:

ilya@ilya-ubuntu:~$ sudo apt-get install g++

If you plan to use the system for development it makes sense to just the build bundle:

ilya@ilya-ubuntu:~$ sudo apt-get install build-essential

A good practice is to issue update and upgrade commands prior to installing any packages.

ilya@ilya-ubuntu:~$ sudo apt-get update
ilya@ilya-ubuntu:~$ sudo apt-get upgrade

Intel Compilers

Most Intel developments tools are commercial products and you need a valid license to use them.  If you have it, the tools are very easy to install.  Htere’s the installation process for the Intel Parallel Studio XE 2016.  Untar the distribution file and run the installation script:

ilya@ilya-ubuntu:~$ tar -xvf parallel_studio_xe_2016_update1.tgz
ilya@ilya-ubuntu:~$ cd parallel_studio_xe_2016_update1/ 
ilya@ilya-ubuntu:~$ ./install.sh

Before using Intel compilers one needs to set environment variables:

ilya@ilya-ubuntu:~$ source /opt/intel/bin/compilervars.sh intel64

A corresponding record in the shell rc file will ensure that the variables are set every time the user logs in .

ilya@ilya-ubuntu:~$ diff ~/.bashrc ~/.bashrc.orig
115d114
< source /opt/intel/bin/compilervars.sh intel64

Now we can test the compiler with a simple hello world example:

ilya@ilya-ubuntu:/tmp$ cat hello.c
#include<stdio.h>
int main(){
printf("hello world\n");
return(0);}
ilya@ilya-ubuntu:/tmp$ icc hello.c -o hello_icc
ilya@ilya-ubuntu:/tmp$ ./hello_icc
hello world
ilya@ilya-ubuntu:/tmp$ gcc hello.c -o hello_gcc
ilya@ilya-ubuntu:/tmp$ ./hello_gcc
hello world

Other Tools

There are many other development tools and packages that might get hand.  Here’s a small sample:

ilya@ilya-ubuntu:~$ sudo apt-get install cmake git libgtk2.0-dev pkg-config 
ilya@ilya-ubuntu:~$ sudo apt-get install python-dev python-numpy
ilya@ilya-ubuntu:~$ sudo apt-get install libtbb2 libtbb-dev
 

Ubuntu Customization

Appearance

The default look of Ubuntu is too dark for my taste, but luckily the UI is easily customizable.  I must be not the only one who finds Mac OS X colors more pleasing because there is a package Macbuntu that transforms Ubuntu desktop to look and feel like Mac OS.   To me it feels like a step too far: I want to feel that I am on Linux, but I want my color palette and keyboard shortcuts to be familiar.

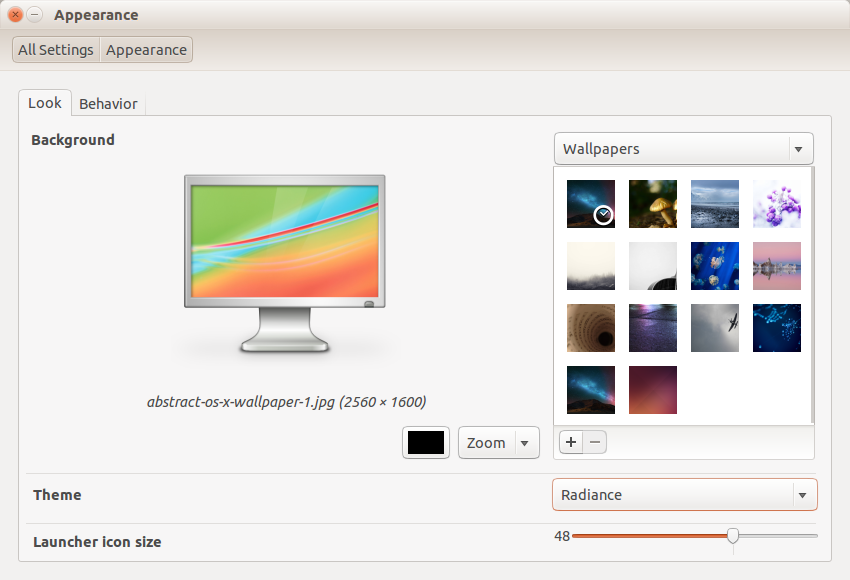
A simple adjustment makes the look more uplifting.  In System Settings under Appearance change the theme from the dark default Ambiance to Radiance.  Also, while you are at it, you can change the desktop wallpaper to something brighter.

Screenshot from 2016-01-24 16:56:56

General Keyboard Shortcuts

Some shortcuts can be found in the Keyboard tab of System Settings, but for real customization we need to issue terminal commands or use ComizConfig Settings Manager.

sudo apt-get install compiz compizconfig-settings-manager

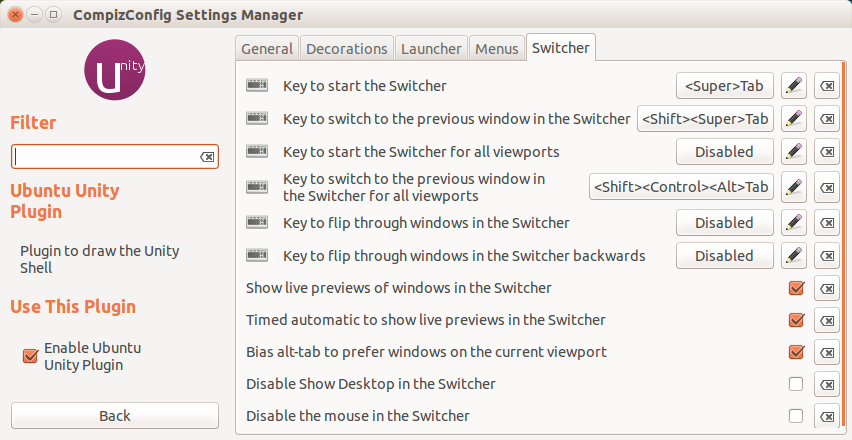
After invoking CompizConfig Settings Manager select Ubuntu Unity Plugin under the Desktop category.  To make the <command>-space combination bring the search form similar to that in Mac OS, select the Launcher tab and change Key to start the Launcher Application Switcher to <Super>space. <Super> is Ubuntu speak for what Apple calls <command> key also known as Windows key on PC keyboards.

To make the application switcher respond to <command><tab> and <shift><command><tab> combinations familiar to Mac users, select the Switcher tab change Key to start the Switcher and Key to switch to the previous window in the Switcher to <Super>Tab and <Shift><Super>Tab respectively.

Screenshot from 2016-01-25 23:08:47

To map the window picker to F3, Mac OS-style, navigate from the top level to
Advanced Search and then select Scale and Bindings, then set Initiate Window Picker to F3 although you’ll see it as XF86LaunchA.

Terminal Appearance and Shortcuts

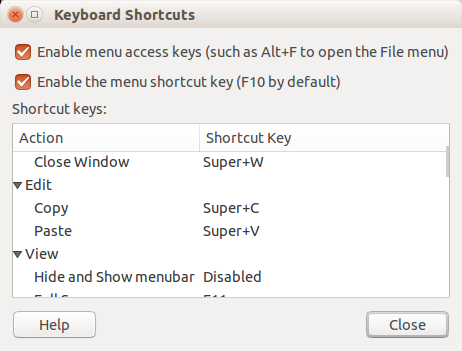
Terminal is the application that I likely use the most so I prefer to adjust its look and feel to the settings I am used to on Mac OS.  To change the font and background colors, launch the terminal and navigate to the Profile Preferences menu under Edit and change the settings to black-on-white.   Then in Keyboard Shortcuts menu of Edit change shortcuts for cut, paste, and new window to familiar settings.

Screenshot from 2016-01-25 23:12:58

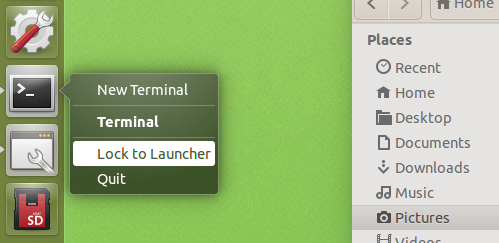
Finally, for those who use terminal often, it makes sense to pin it to the launcher by right clicking on its icon and selecting the corresponding option.

Screenshot from 2016-01-25 23:17:36

Mouse Scrolling Direction

To reverse the mouse scroll direction (disable natural scrolling) put the following line

pointer = 1 2 3 5 4 6 7 8 9 10 11 12

in the ~/.Xmodmap file and re-login.


Installing Ubuntu

Prepare Bootable Media

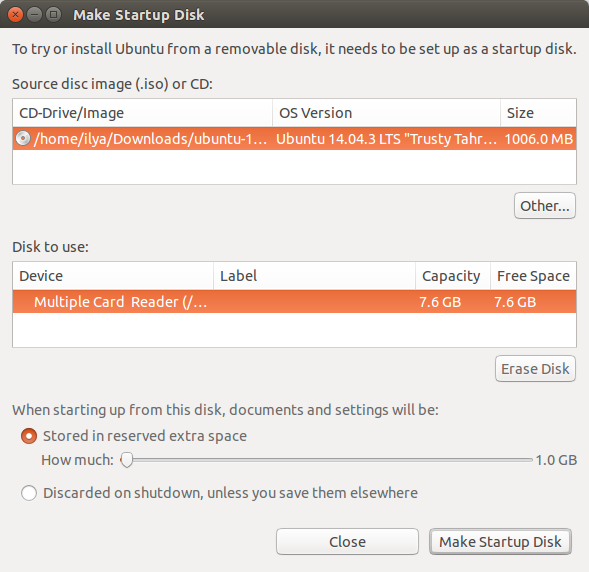
Installing Ubuntu on a new computer is straightforward. First, prepare a bootable USB stick or SD card. On another machine running Ubuntu download the latest OS image and save it to a local file. Then run Startup Disk Creator. Click on the Other button on the opening screen to navigate to the image.

Screenshot from 2016-01-24 18_22_03

Select target USB device and click Make Startup Disk.

Installation

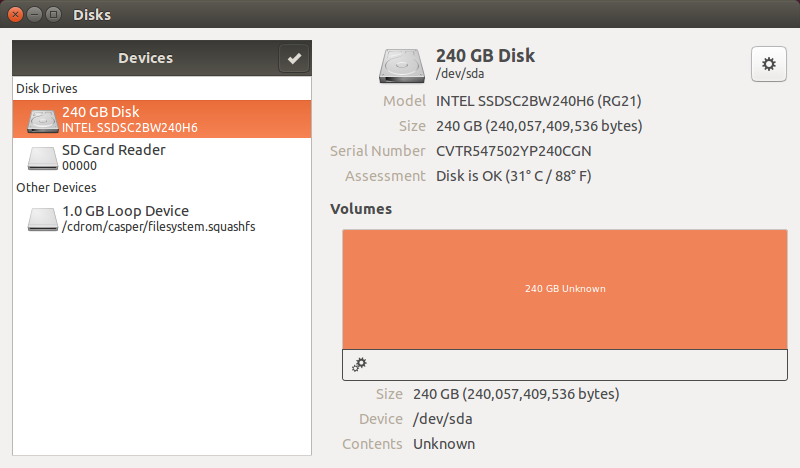
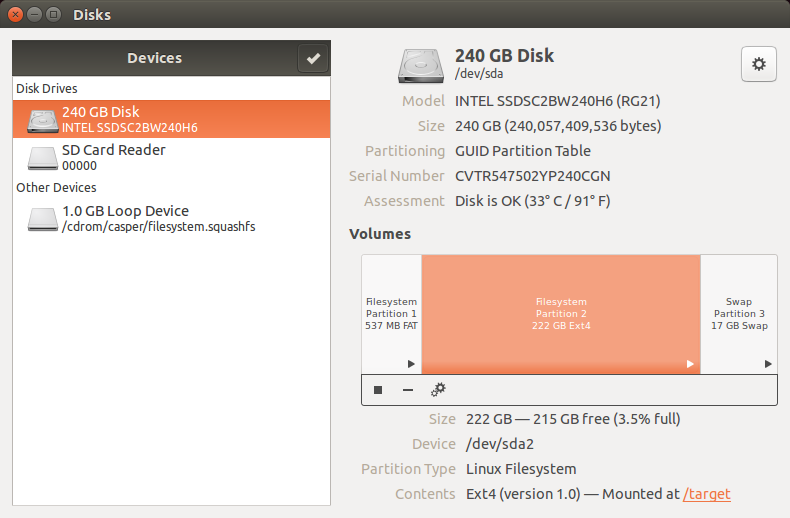
I suggest booting Ubuntu from a USB device prior to installation to make sure that all system components are visible to the operating system.  In particular, make sure that storage devices can be used.  Run Disk application to check if the target device is visible.

Screenshot from 2016-01-24 22_38_27

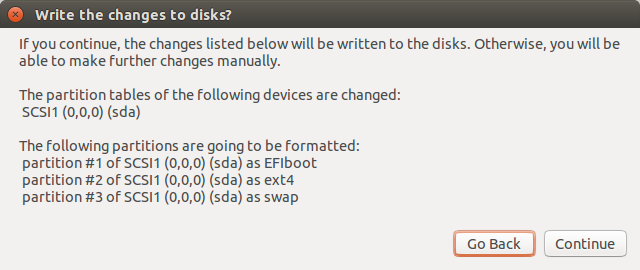
Run Install Ubuntu application.  By default it will create three partitions on target disk drive: EFIboot, Linux filesystem, and Swap.

Screenshot from 2016-01-24 22:55:55

Default breakdown will work fine.  On my system with 16GB of RAM and 240GB SSD the Linux partition takes 222GB, Swap takes 17GB and EFIboot is less than a gigabyte.

Screenshot from 2016-01-24 15:04:42

Once installation completes, reboot the system and it is ready to go.

The user account created during installation has superuser privileges but it’s also handy to have access to the root account. To set the password for root just run passwd under sudo.

ilya@ilya-ubuntu:~$ sudo passwd

If you want to keep the PATH environment settings from your user account when you use sudo you can edit the settings in /etc/sudoers:

root@lin1:~# diff /etc/sudoers /etc/sudoers.orig
9,11c9,11
< #Defaults	env_reset
< #Defaults	mail_badpass
< #Defaults secure_path="/usr/local/sbin:/usr/local/bin:/usr/sbin:/usr/bin:/sbin:/bin" --- > Defaults	env_reset
> Defaults	mail_badpass
> Defaults	secure_path="/usr/local/sbin:/usr/local/bin:/usr/sbin:/usr/bin:/sbin:/bin"

To run sudo commands with the same LD_LIBRARY_PATH as the user account one can explicitly pass it as a parameter:

$ sudo LD_LIBRARY_PATH=$LD_LIBRARY_PATH pip install -U scikit-learn

or include an alias in the the ~/.bashrc file:

alias sudo='sudo LD_LIBRARY_PATH=$LD_LIBRARY_PATH'

In either case one should ensure that PATH and LD_LIBRARY_PATH don’t point to directories with malicious code as it wreak havoc on the system if executed with superuser privileges.